


Photography is an art form that captures moments, emotions, and stories. Whether you’re a budding photographer, a small business owner looking to take product photos, or simply someone interested in experimenting with photography, creating a DIY home photo studio can be an affordable and convenient solution. With the right tools and setup, you can produce professional-quality photos without ever leaving the comfort of your home. This article will guide you through the process of setting up your own DIY home photo studio, from selecting the right space to investing in essential equipment.
Assessing Your Space
Before you dive into purchasing equipment, it’s important to choose the right space for your photo studio. Ideally, you’ll want a room with ample natural light, but if that’s not an option, a space where you can control the lighting will suffice. It could be a spare room, a corner of your living room, or even a balcony if you have the space. The key is to ensure you have enough room to move around and set up your backdrop and props without feeling cramped.
Essential Equipment for a DIY Home Photo Studio
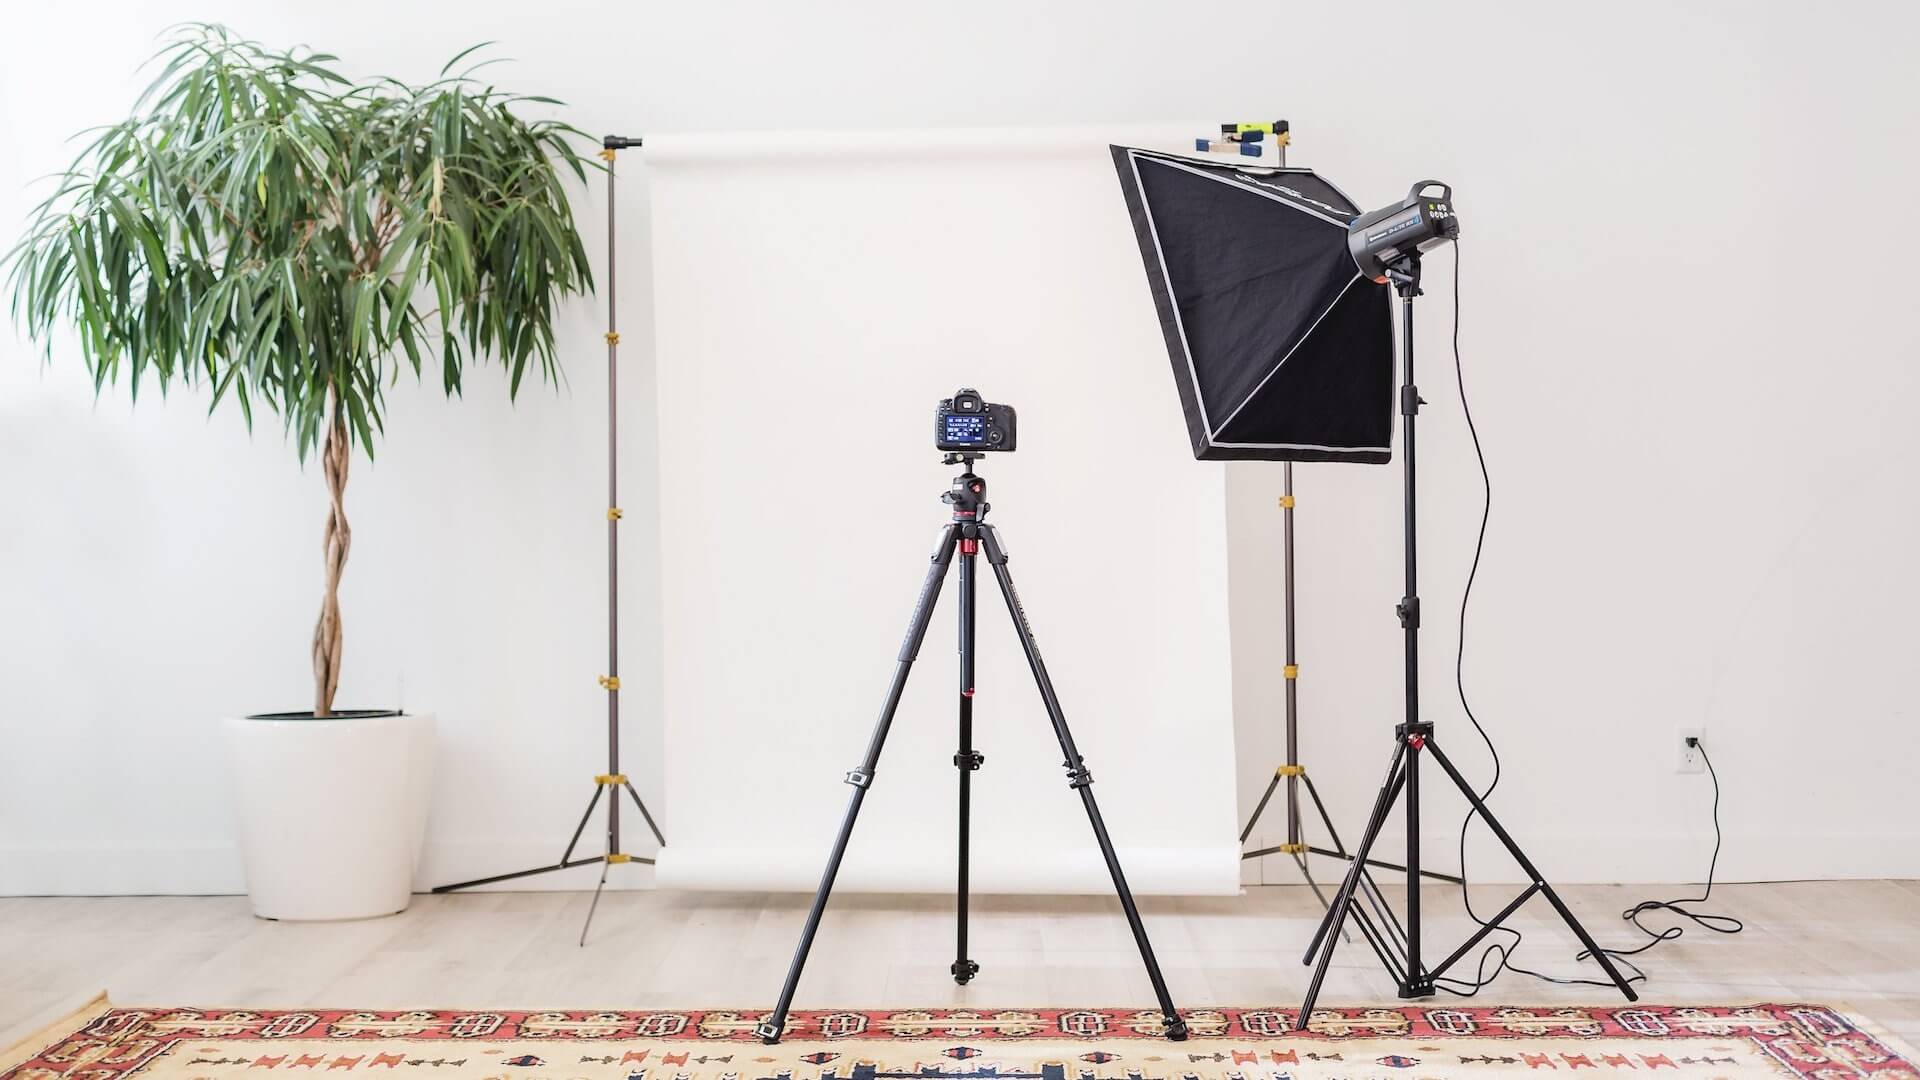
- Lighting: Lighting is one of the most important aspects of photography, and having the right lighting setup will drastically improve the quality of your photos. There are two main types of lighting you can use:
- Natural Light: If you’re fortunate enough to have a space with lots of natural light, take full advantage of it. Position your subject near a large window, but avoid direct sunlight as it can create harsh shadows.
- Artificial Lighting: If natural light isn’t enough or if you want to have full control over your photos, invest in artificial lighting. A basic setup involves a softbox or two, which diffuses light evenly to create a soft, flattering glow on your subject. You can also use a ring light for more direct, focused lighting, especially for portrait shots.
- Backdrop: A clean and simple backdrop can make your photos look professional and polished. There are various options you can consider:
- Plain Fabric or Paper Rolls: A solid-colored backdrop is a classic choice for product photography or portrait sessions. You can use a fabric backdrop, such as a large piece of cloth, or opt for a roll of seamless paper that’s specifically designed for photography.
- Textured or Creative Backdrops: If you want to add a bit of personality to your photos, try using a textured backdrop, such as wood, brick, or even a fabric with patterns. Just make sure it doesn’t distract from your subject.
- Camera: While you don’t need the most expensive camera to create a DIY photo studio, you’ll want something that gives you control over settings like shutter speed, aperture, and ISO. A DSLR or mirrorless camera is ideal, but even a smartphone with a good camera can suffice, especially if you have proper lighting.
- Tripods and Mounts: Stability is key to sharp, clear photos, and a tripod will ensure that your camera remains steady during shots. Invest in a sturdy tripod with adjustable height and angles to allow flexibility in positioning your camera.
- Props and Accessories: Props add interest and context to your photos. For portrait photography, consider using furniture, mirrors, or personal items to enhance the shot. For product photography, think about how to style your items with simple props like textured fabrics, plants, or minimalistic items that highlight your subject.
Lighting Techniques and Setup
Once you have your lighting equipment, it’s time to set it up. A basic lighting setup consists of a key light, fill light, and backlight:
- Key Light: This is your main light source and should be placed at a 45-degree angle from your subject. This will provide the most direct light and shape the overall look of your photo.
- Fill Light: The fill light softens the shadows created by the key light. It’s usually placed on the opposite side of the key light, at a lower intensity.
- Backlight: A backlight adds depth to your image by separating your subject from the background. This is especially useful for portraits.
If you’re using natural light, try to position your subject near a window that lets in soft, diffused light. You can use sheer curtains or a diffuser to soften harsh sunlight.
Creating a Functional Workflow
Once your space is set up with the necessary equipment, it’s time to create an efficient workflow. Ensure your backdrop is easily interchangeable, and organize your props and accessories in a way that allows quick access. Make sure your camera and lighting setup are easy to adjust for different shots, and keep your area clean to avoid clutter in your photos.
Editing Your Photos
After shooting, editing your photos will enhance their overall quality. Basic editing tools like Adobe Lightroom or Photoshop allow you to adjust exposure, contrast, white balance, and sharpness. For beginners, free editing software like GIMP or mobile apps can also help improve your images. Experiment with different filters and edits to find your style, but remember to keep it natural for a professional finish.
Examples of DIY Photo Studio Setups
- Portrait Setup: A softbox light at 45 degrees to the left of your subject, a fill light on the right, and a white backdrop for clean, sharp portraits.
- Product Setup: Use a lightbox or a softbox with a diffuser to evenly light your product. Place the product against a neutral backdrop to keep the focus on it.
Conclusion
Setting up a DIY home photo studio doesn’t have to be expensive or complicated. With the right equipment, lighting, and space, you can create professional-quality photos without leaving your home. Whether you’re a hobbyist or a small business owner, a home photo studio offers both convenience and flexibility, allowing you to control every aspect of your photography. So grab your camera, set up your space, and start capturing stunning images today!
Refer to these sources for related topics:
https://familynursehomecare.com
https://scottishrepublicansocialistmovement.org
https://blithespirittheplay.com
https://vieille-charite-marseille.org
https://cannabisprofitscourse.com
https://macgregorsladiesfashion.com
https://easternfashiononline.com